Running BeOS 5 in QEMU (i386)
BeOS is an operating system from the '90s, notable for its prescient technical decisions and abject business failure
Installation media
The installation CD-ROM for BeOS Pro Edition 5.0 is available on the Internet Archive. It's been uploaded there at least twice, but the content is identical, so either one works. You'll need both the .bin and .cue files.
- BeOS Version 5.0.3 Intel and PPC (uploaded 2017-08-23)
- BeOS Professional Edition 5.0.3 (uploaded 2021-08-18)
shasum -a 256 *
# 1889fd6cf5af4259b01c9d1925e62f664effdf9dd88f924dc9b4da41ce1f0106  BeOS_Tools.bin
# 6f4fd9fbf7dff01d27391bee3b8bb27def7ed2fcd978f4b698c220b69eb89af9  BeOS_Tools.cue
# 1889fd6cf5af4259b01c9d1925e62f664effdf9dd88f924dc9b4da41ce1f0106  beos-5.0.3-professional-gobe.bin
# a57d9552cdadbbdbe6f608e8dbe9ac2bec2a010da1ad801fc0176e4d66bb234c  beos-5.0.3-professional-gobe.cue
The BeOS installation media has an unusual layout with three separate filesystems, which must be split to be usable by QEMU
curl -L -O https://raw.githubusercontent.com/hessu/bchunk/release/1.2.2/bchunk.c
shasum -a 256 bchunk.c
# 34ce2e8c23b41a9f14a7e4f50e14996f2754c27237ba431ede1caaee39e759a6  bchunk.c
gcc -o bchunk bchunk.c
./bchunk BeOS_Tools.bin BeOS_Tools.cue BeOS_Tools.iso
# binchunker for Unix, version 1.2.2 by Heikki Hannikainen <hessu@hes.iki.fi>
# 	Created with the kind help of Bob Marietta <marietrg@SLU.EDU>,
# 	partly based on his Pascal (Delphi) implementation.
# 	Support for MODE2/2352 ISO tracks thanks to input from
# 	Godmar Back <gback@cs.utah.edu>, Colas Nahaboo <Colas@Nahaboo.com>
# 	and Matthew Green <mrg@eterna.com.au>.
# 	Released under the GNU GPL, version 2 or later (at your option).
#
# Reading the CUE file:
#
# Track  1: MODE1/2352    01 00:00:00
# Track  2: MODE1/2352    01 10:48:58
# Track  3: MODE1/2352    01 46:07:03
#
# Writing tracks:
#
#  1: BeOS_Tools.iso01.iso   95/95   MB  [********************] 100 %
#  2: BeOS_Tools.iso02.iso  310/310  MB  [********************] 100 %
#  3: BeOS_Tools.iso03.iso  236/236  MB  [********************] 100 %
shasum -a 256 *.iso
# 5c193d1855ad542f9a40a092a32bf2c6072e273a51d781dbf925a9a02e66d759  BeOS_Tools.iso01.iso
# 0031b4eb35a8ebfcf578d197c2372dfda0f748ef260f44dba2dd93740da35626  BeOS_Tools.iso02.iso
# 26b771b4f22f01b3311b86c82d4a7c2f6d84973b2ed506cf8d65738732f21708  BeOS_Tools.iso03.iso
Of the split files, iso01 is bootable. The other two are BeFS filesystems containing x86 and PowerPC installation data.
ls -lh *.iso
# -rw-rw-r-- 1 john john  96M Oct  8 14:56 BeOS_Tools.iso01.iso
# -rw-rw-r-- 1 john john 311M Oct  8 14:56 BeOS_Tools.iso02.iso
# -rw-rw-r-- 1 john john 236M Oct  8 14:56 BeOS_Tools.iso03.iso
sudo mount -o loop BeOS_Tools.iso01.iso BeOS_Tools_01
sudo mount -o loop BeOS_Tools.iso02.iso BeOS_Tools_02
sudo mount -o loop BeOS_Tools.iso03.iso BeOS_Tools_03
ls BeOS_Tools_01
# AUTORUN.INF  boot.catalog  floppy.img  GNU  Gobe  Macintosh  Personal  PMAGIC
ls BeOS_Tools_02
# apps  beos  demos  home  _packages_  preferences  var
file BeOS_Tools_02/beos/apps/Terminal
# BeOS_Tools/beos/apps/Terminal: ELF 32-bit LSB shared object, Intel 80386, version 1 (SYSV), dynamically linked, not stripped
file BeOS_Tools_03/beos/apps/Terminal
# BeOS_Tools/beos/apps/Terminal: header for PowerPC PEF executable
Note how the x86 edition of BeOS uses a common executable format (ELF), whereas the PowerPC edition uses PEF from early Mac OS. It's an unusual decision.
Booting the installer
We're now ready to start up QEMU and enter the BeOS graphical installer.
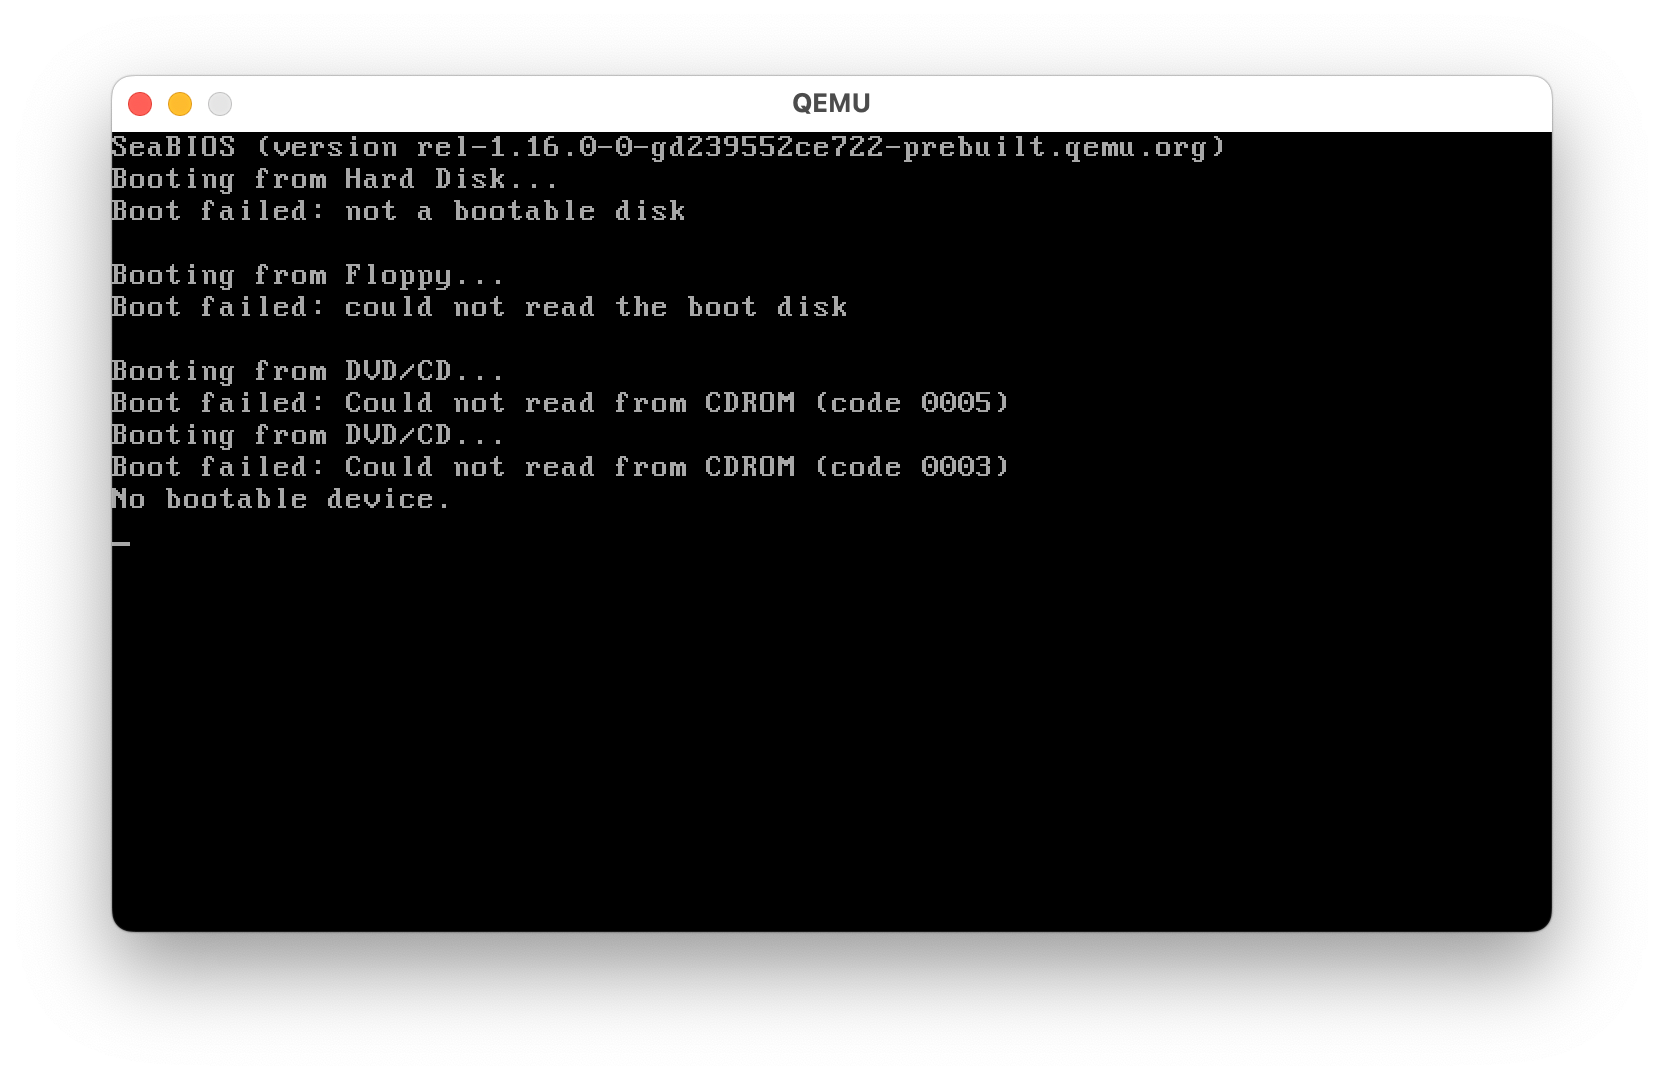
qemu-system-i386 -version
# QEMU emulator version 7.0.0
# Copyright (c) 2003-2022 Fabrice Bellard and the QEMU Project developers
qemu-img create -f qcow2 beos-5.img 1G
# Formatting 'beos-5.img', fmt=qcow2 cluster_size=65536 extended_l2=off compression_type=zlib size=1073741824 lazy_refcounts=off refcount_bits=16
qemu-system-i386 -m 512M \
  -drive media=cdrom,file=BeOS_Tools.iso01.iso \
  -drive media=cdrom,file=BeOS_Tools.iso02.iso \
  -drive file=beos-5.img

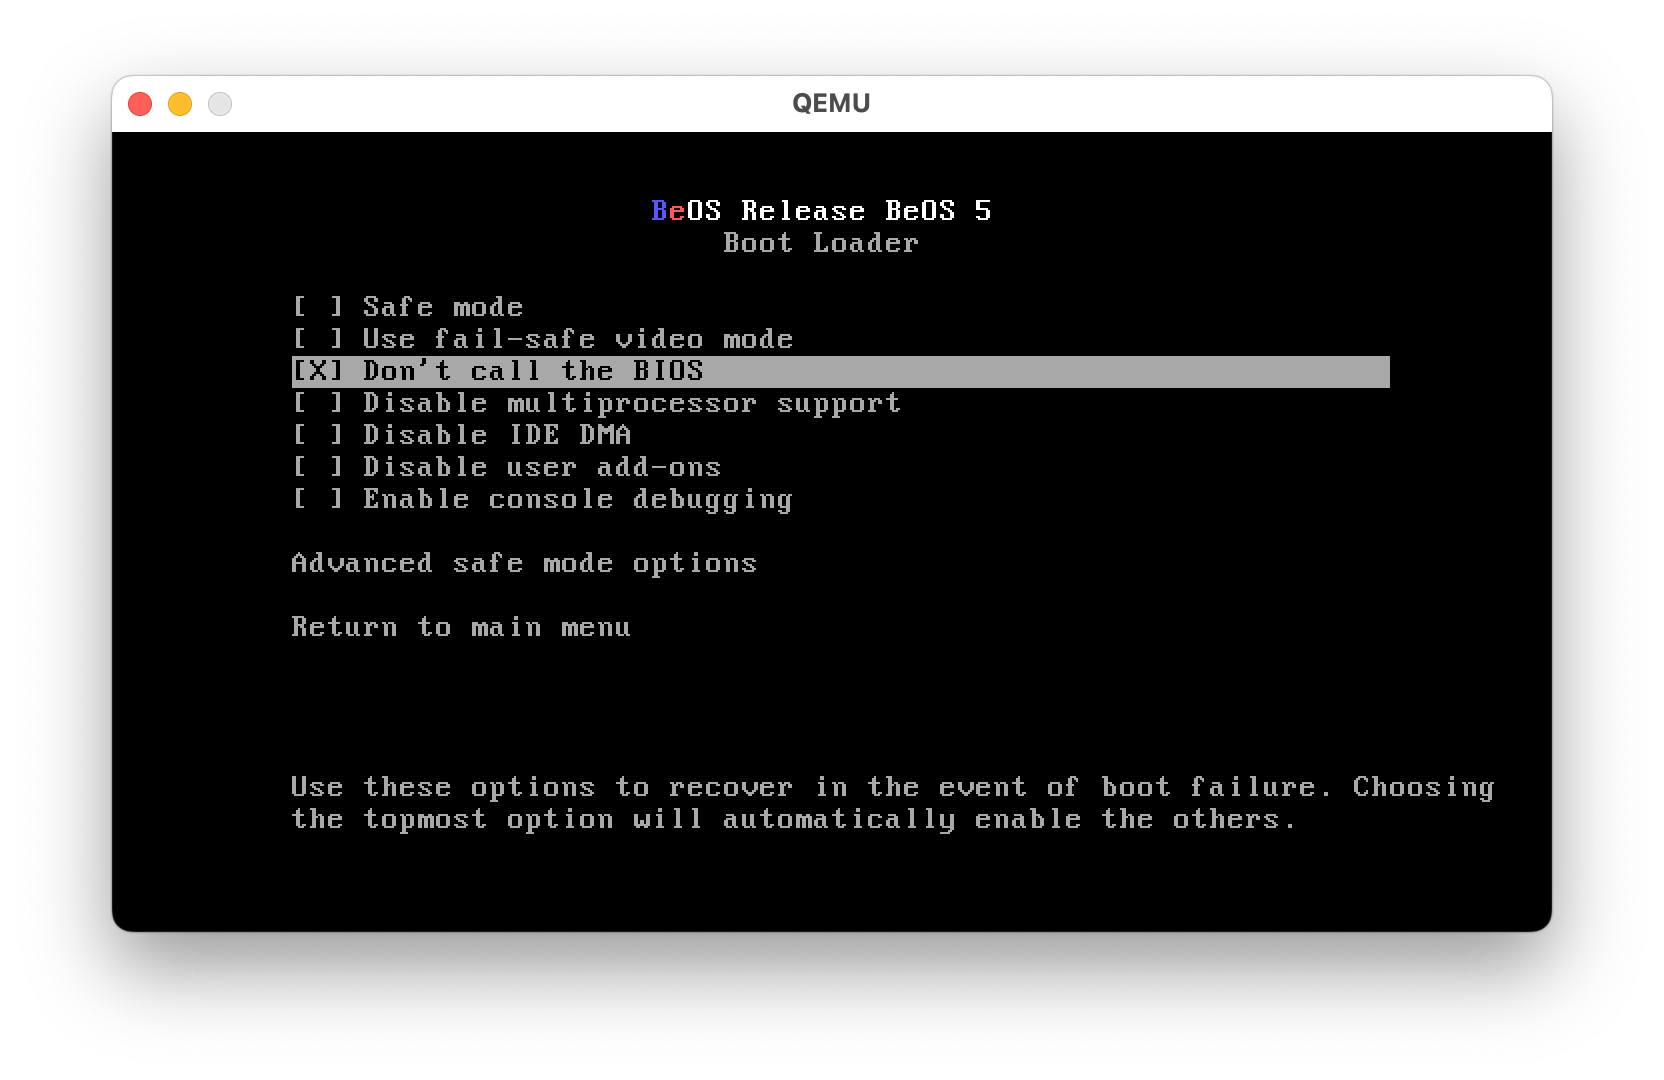
At this point the screen will go blank and no further progress happens. To proceed, we must use the boot menu to disable BIOS calls.

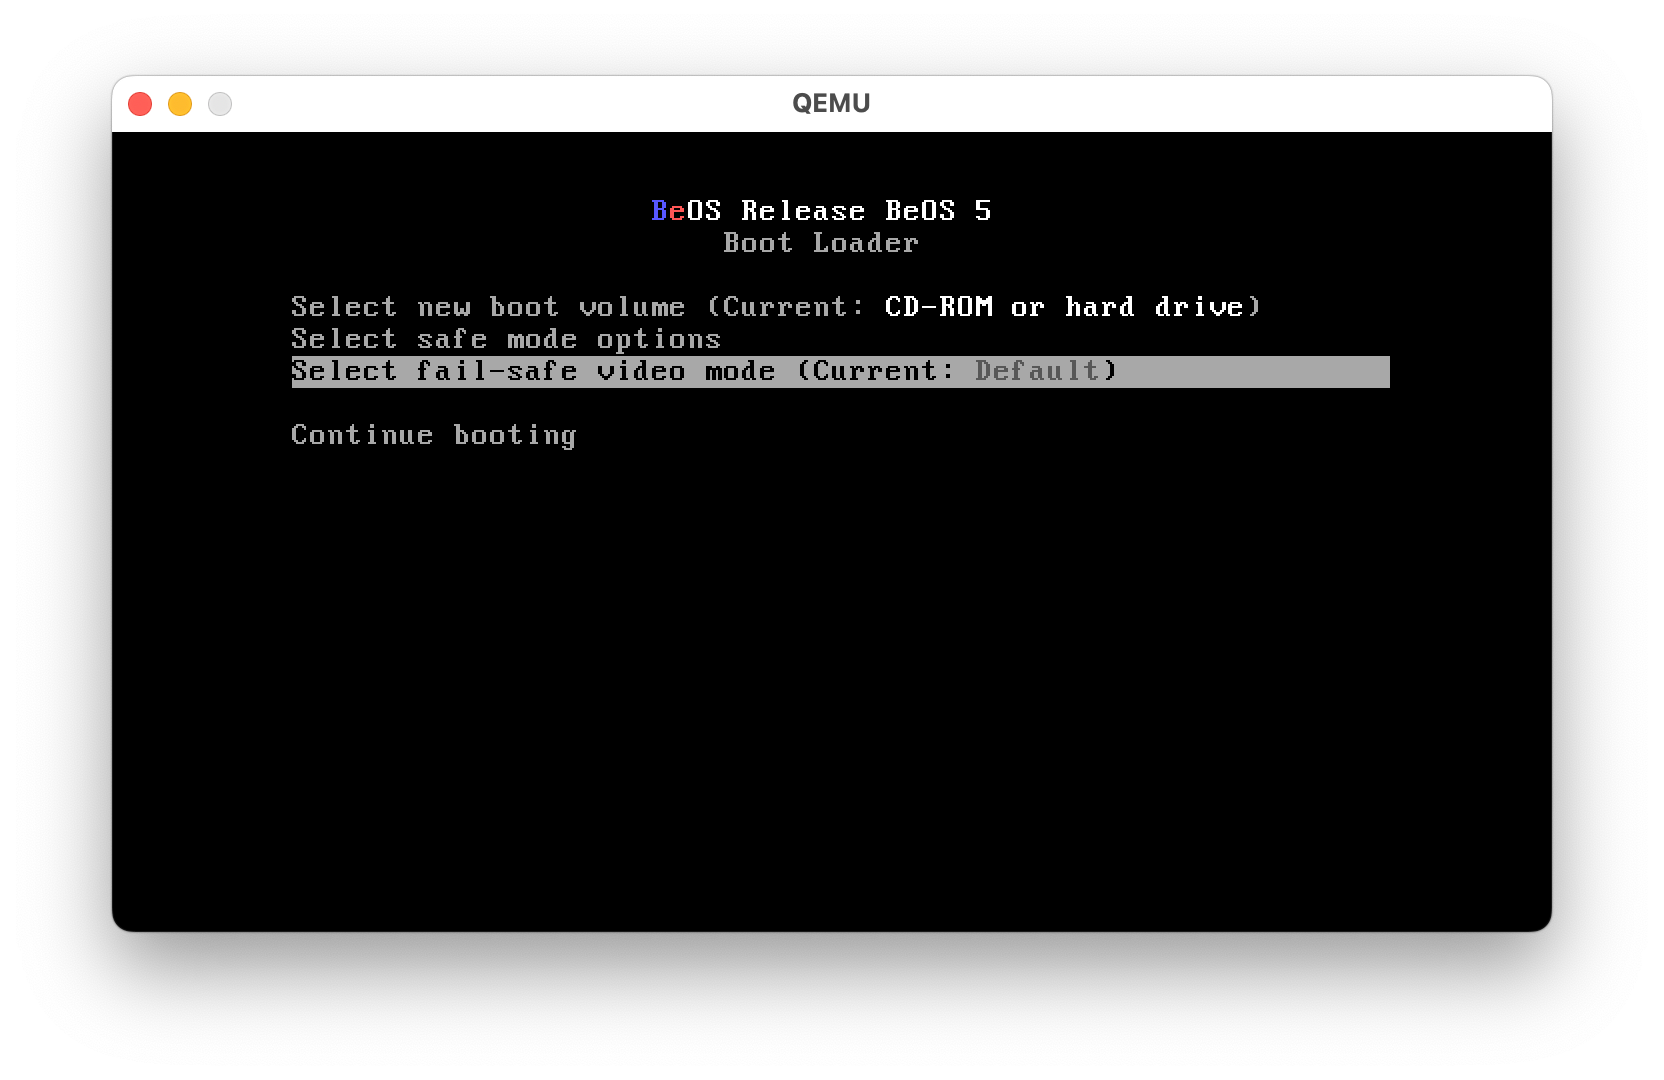
The installer is now able to boot, and it would actually be able to fully install from here. However, BeOS doesn't recognize the QEMU graphics device and therefore defaults to low-resolution greyscale graphics.
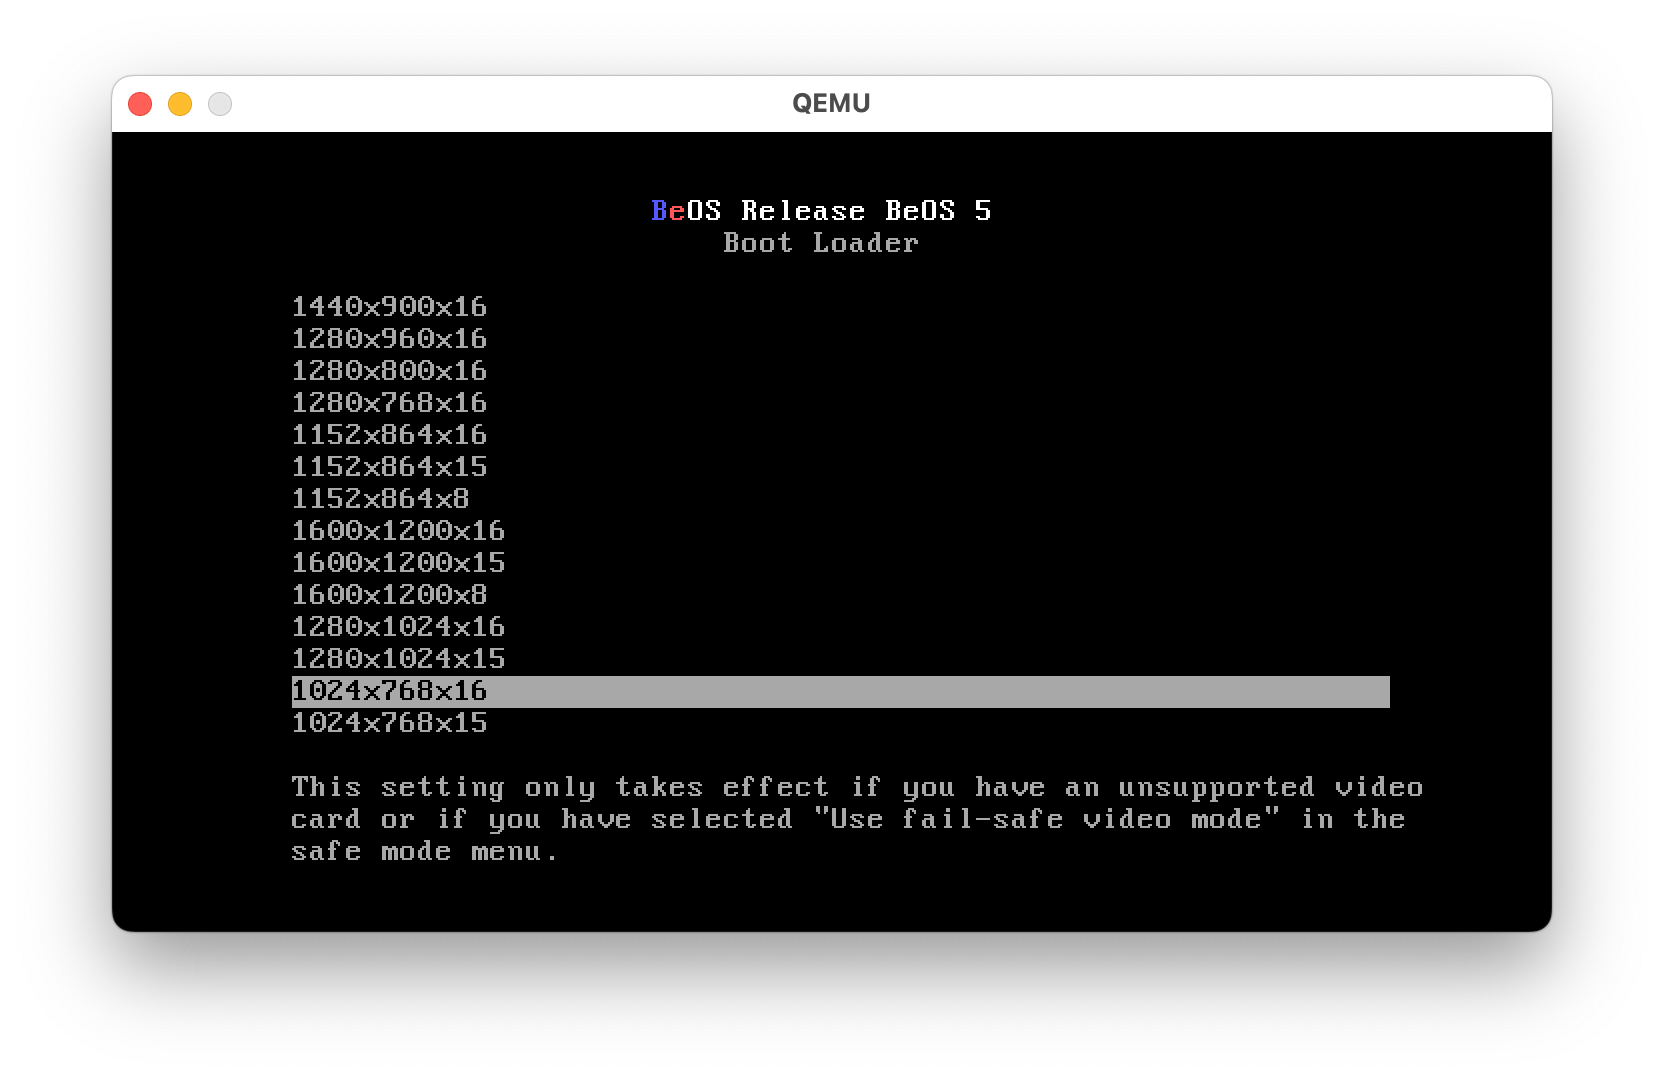
Going back to the boot screen, the default video mode can be manually configured to something more reasonable. I picked 1024x768x16 to get color and a bit more usable screen area.
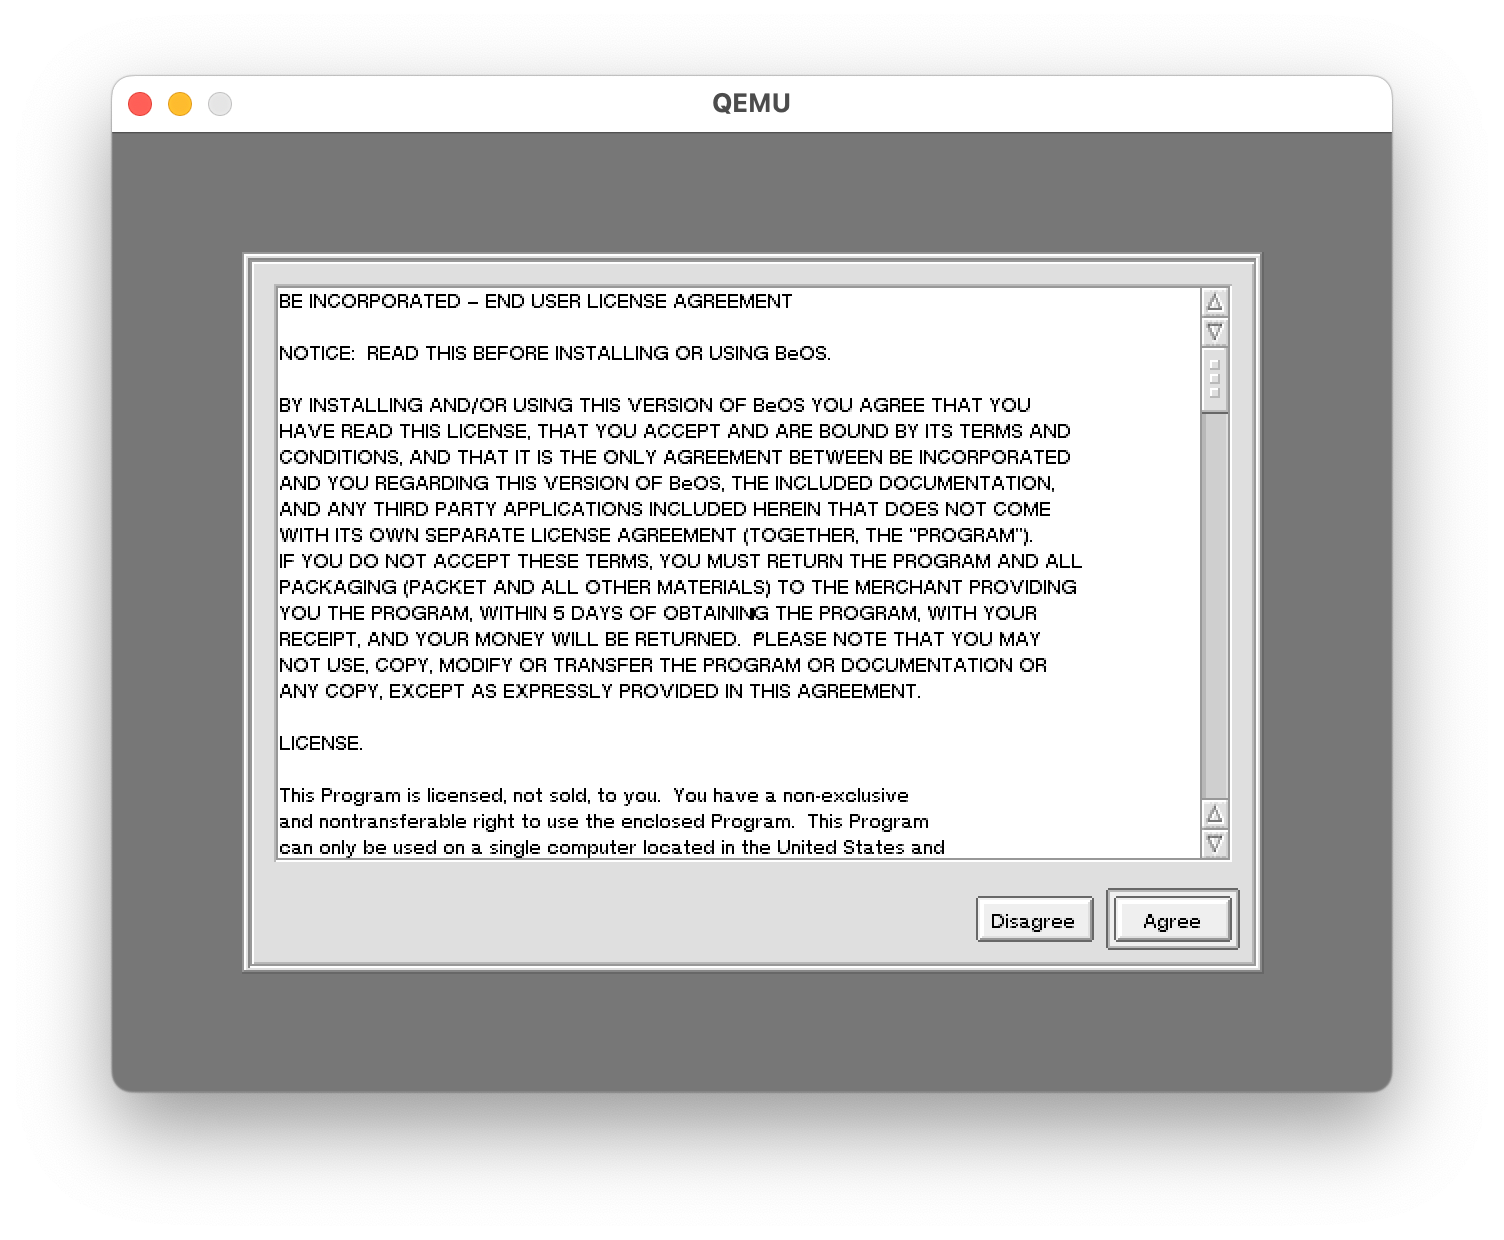
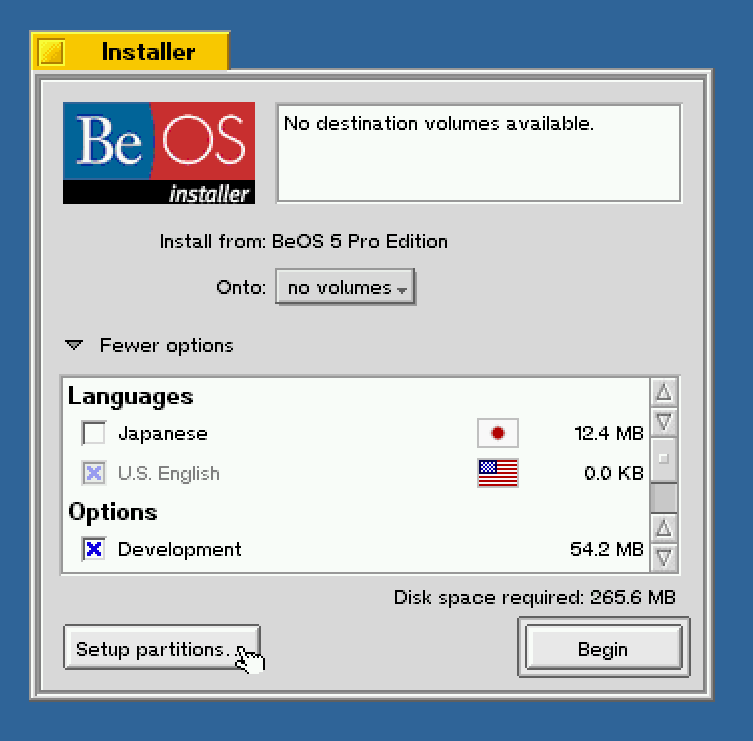
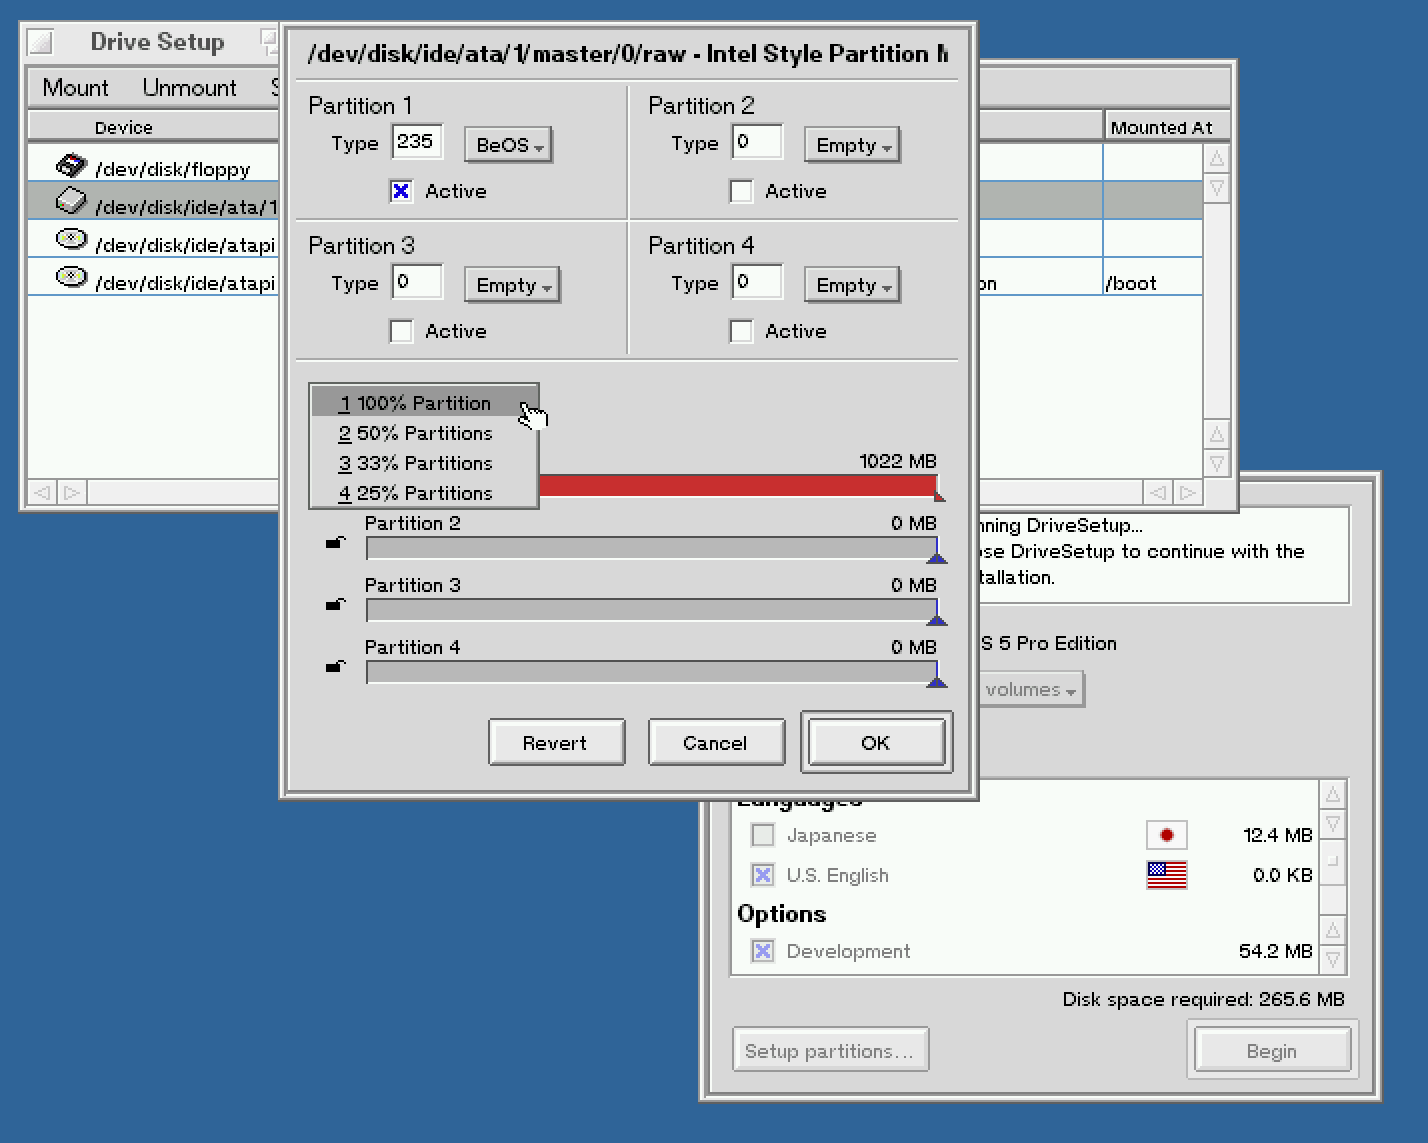
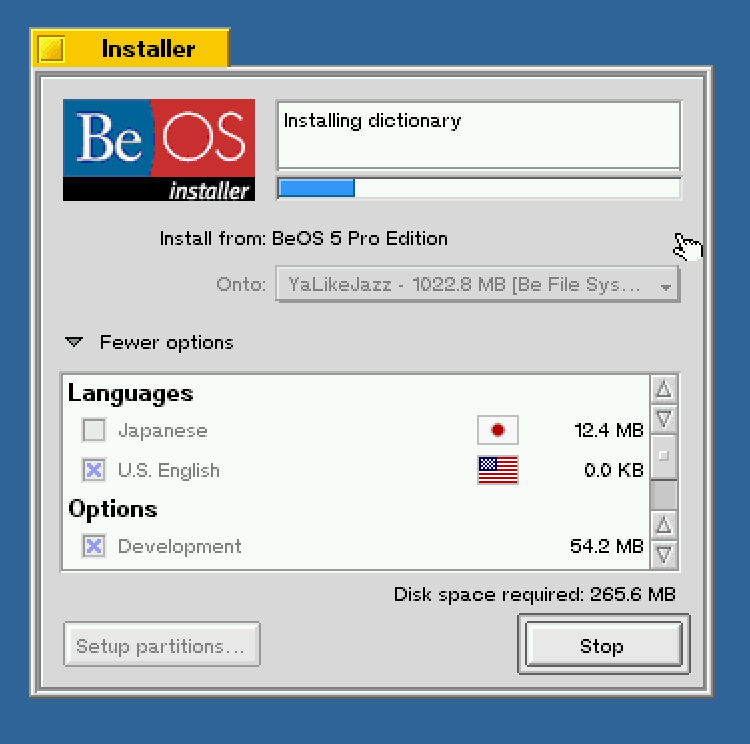
BeOS is now ready to install.
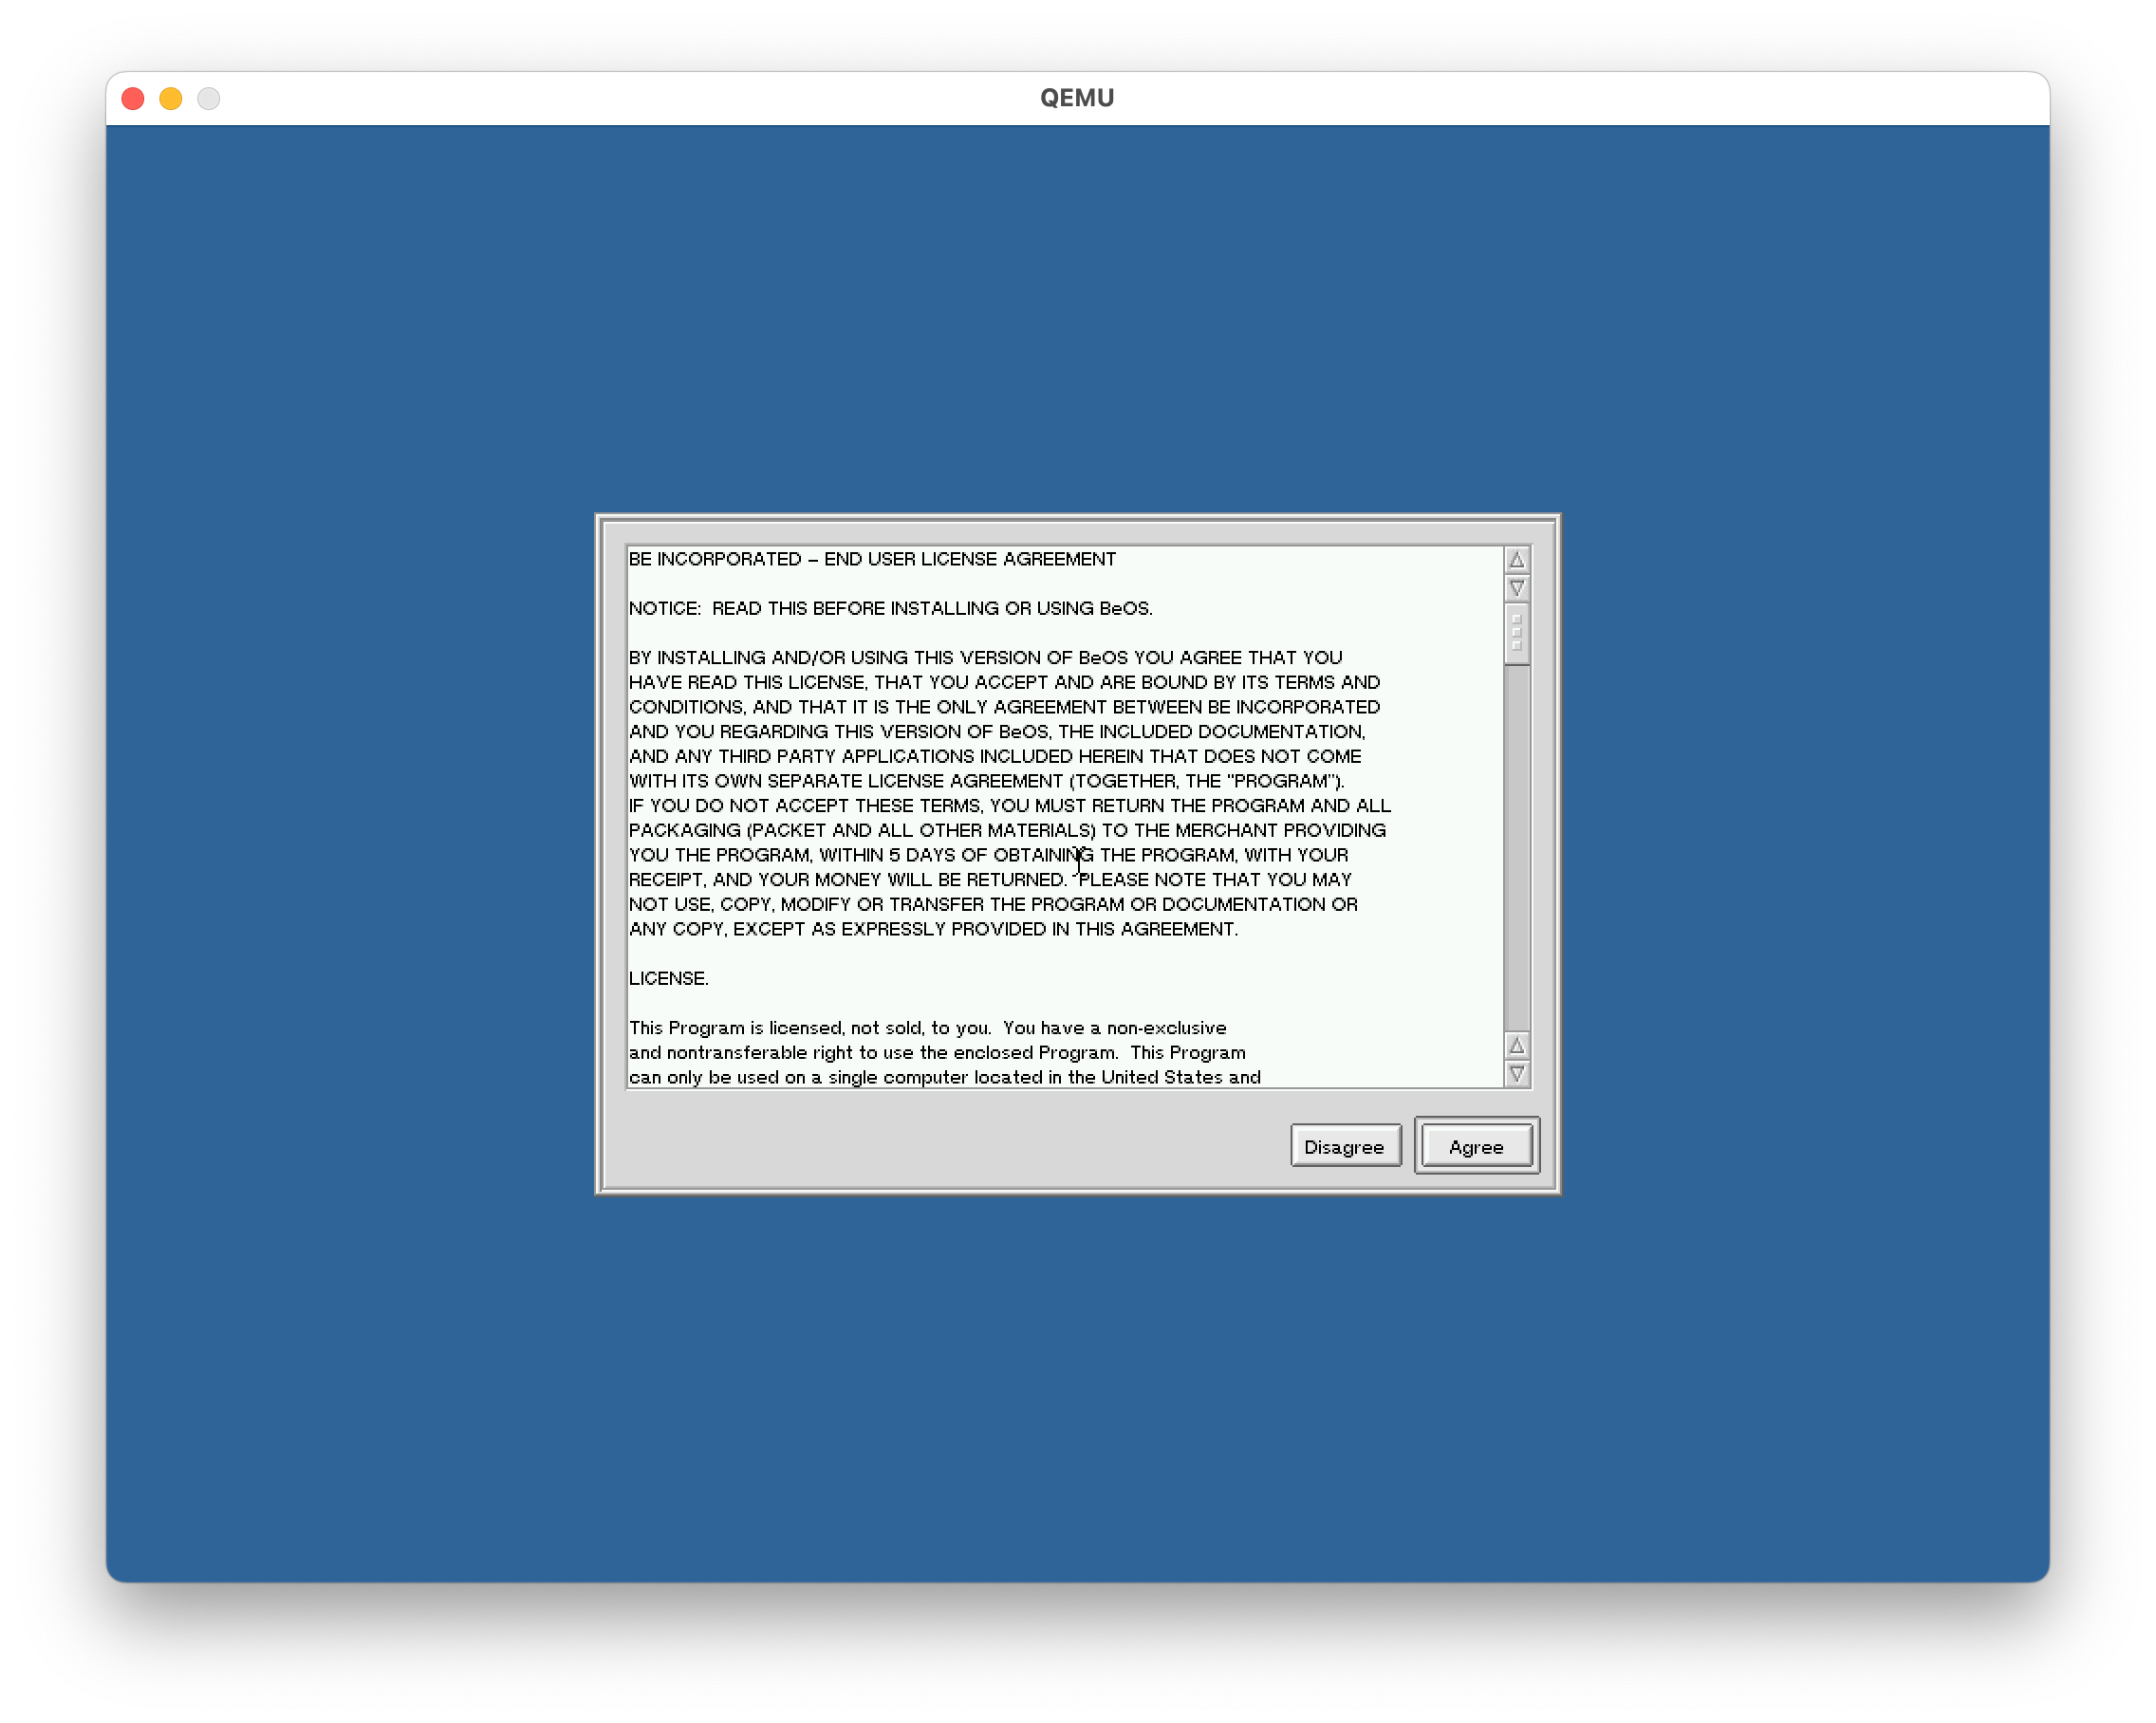
Installing BeOS
The installation process for BeOS 5 is mostly unremarkable to modern eyes, but remember this thing was a contemporary of Windows 98. The typical installer UI back then used text-mode VGA, and then here comes BeOS with full graphics (the windows repaint on drag!) straight from the installation media.
Also, I say mostly unremarkable, because there's no modern OS in the world that could install a complete desktop environment (including web browser and development tools) in 265 MB. Chrome is larger than that just by itself
Post-install configuration
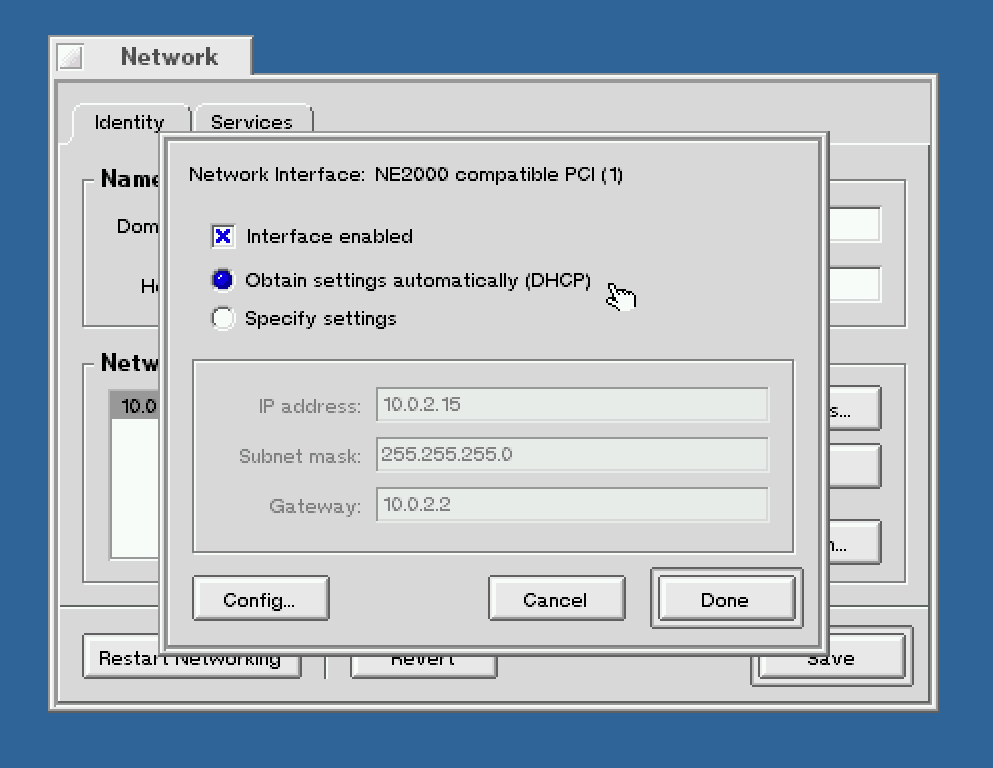
At this point, BeOS has been installed but still has some emulation issues. It will kernel panic on startup unless BIOS calls are disabled in the boot menu, and the graphics will default to 640x480 greyscale. Also, it doesn't have any network connectivity.
For networking, the list of supported NICs is available at BeOS Ready List - Intel » BeOS Ready Network Cards and Connections. QEMU's default NIC emulates an Intel e1000, but it can also emulate the NE2000 family supported by BeOS.
$ qemu-system-i386 -m 512M -drive file=beos-5.img -nic user,model=ne2k_pci
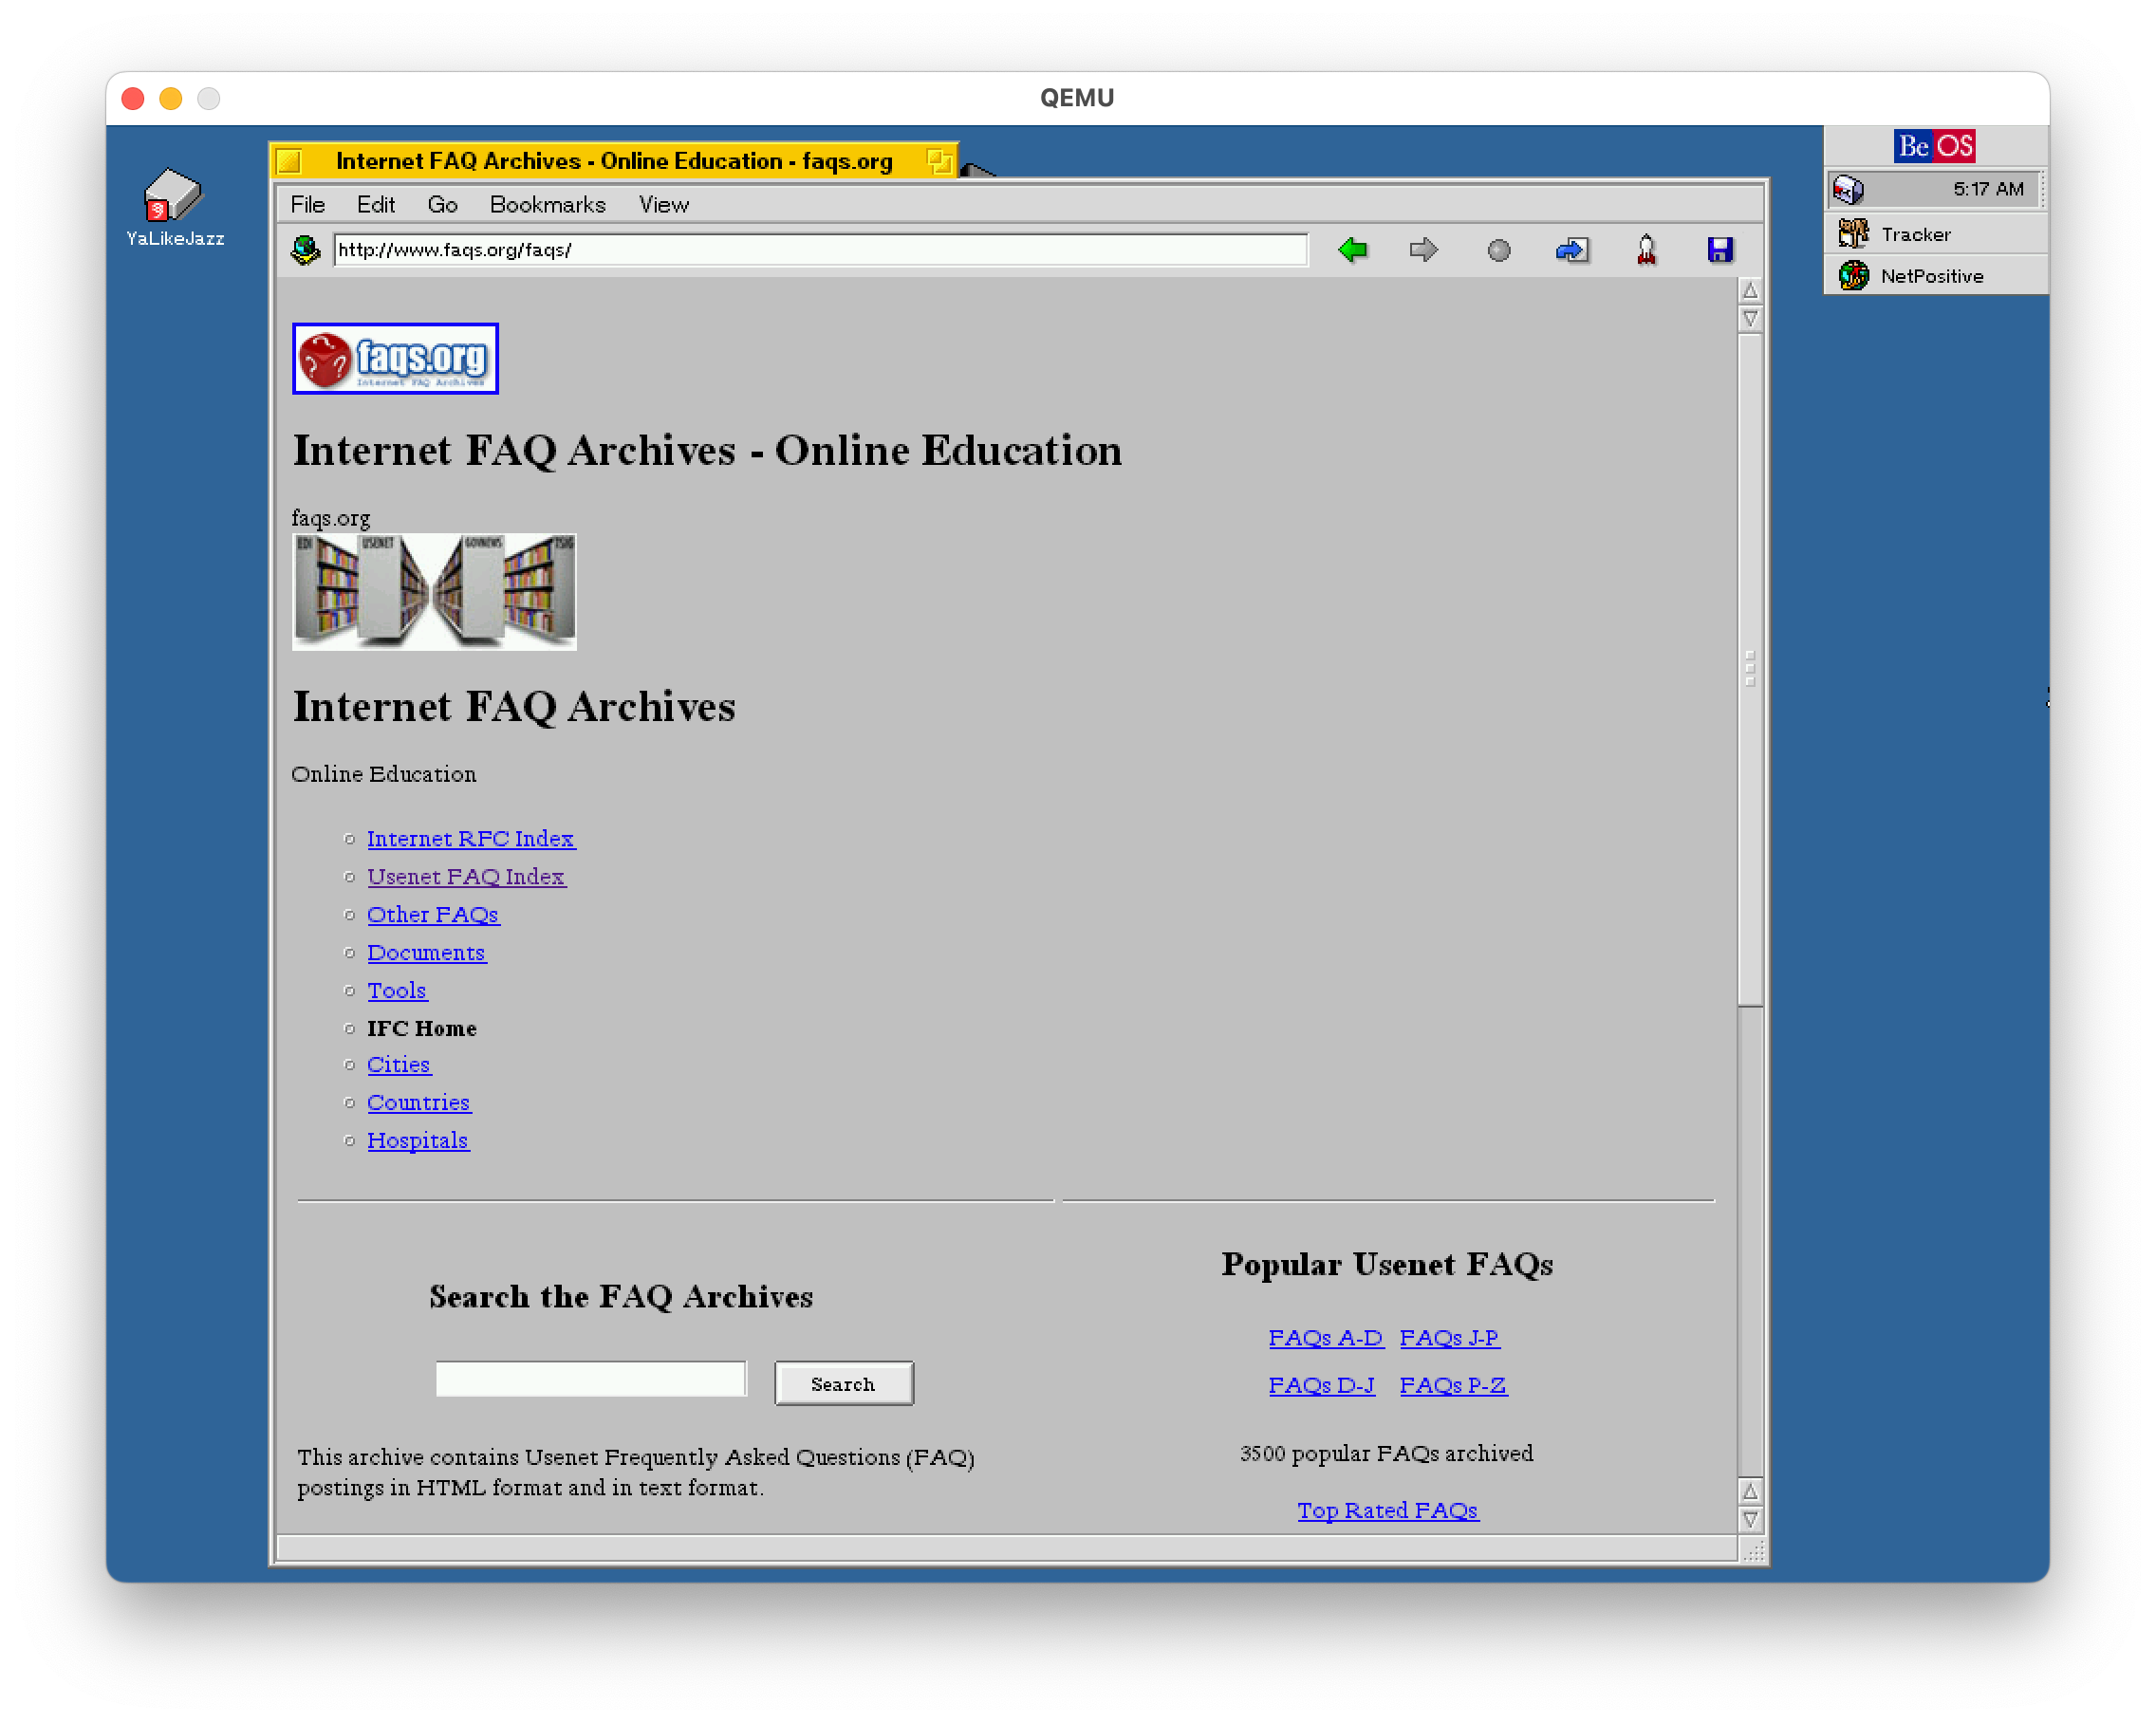
Once booted, go into the BeOS network preferences and enable DHCP. Click "restart networking" to let the changes take effect. The QEMU user-mode networking stack has built-in DHCP and DNS servers, so it doesn't matter how the host system is configured.
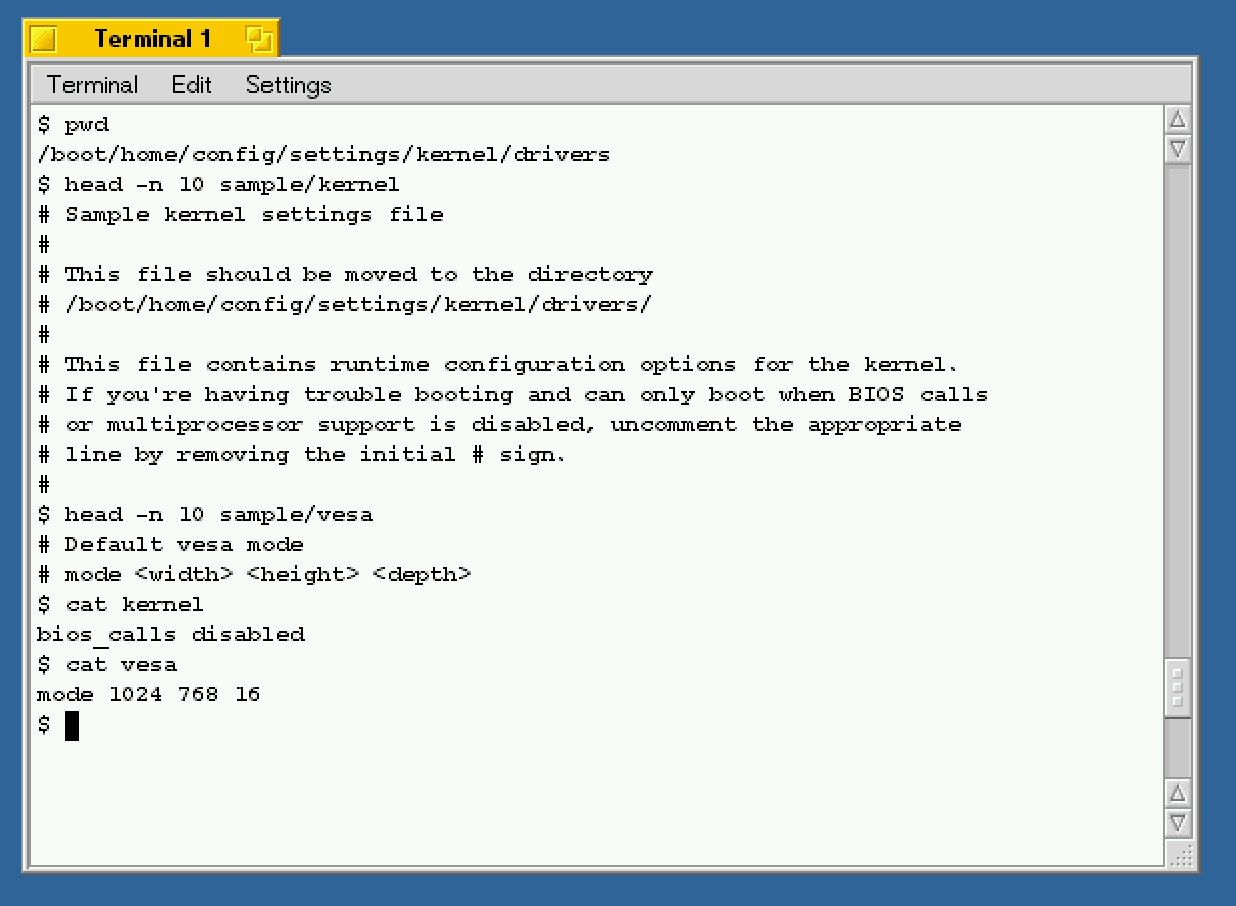
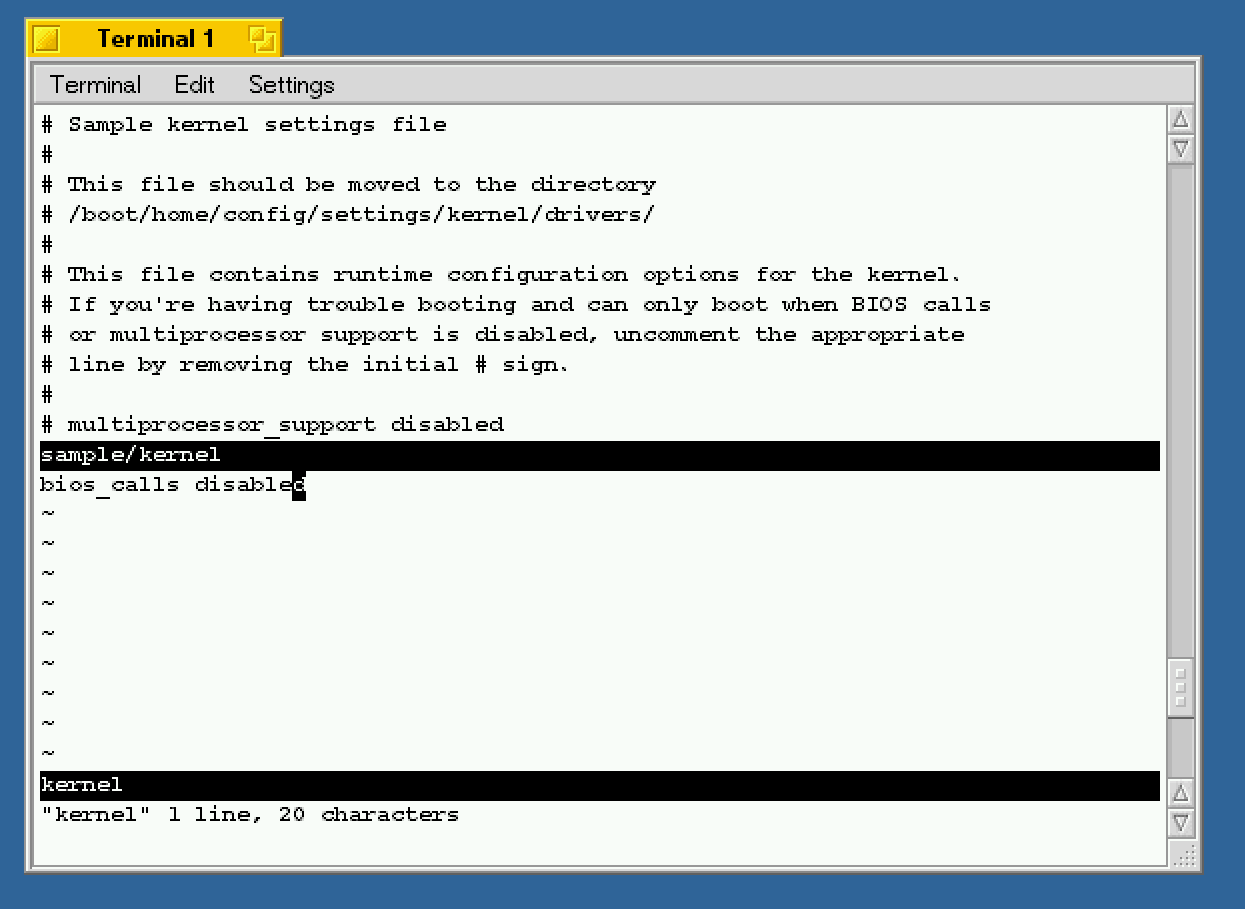
Next up is fixing the default graphics and disabling BIOS calls. Open a terminal into /boot/home/config/settings/kernel/drivers. This directory configures the BeOS boot loader; the sample/ directory contains example config files.
Using sample/kernel and sample/vesa as a guide, create two files in [...]/kernel/drivers:
- File kernel should contain bios_calls disabled
- File vesa should contain mode 1024 768 16 (or whatever resolution you want)
BeOS 5.0.3 comes with VIM 4.5, so features like `:split` are available.
Booting now works without any special boot menu selection, and the built-in web browser can be used to view any page that allows plaintext
Unfortunately for BeOS, technical innovation alone was not enough to pay the bills. After rejecting a $200 million buyout offer from Apple
[2] , Be Inc struggled to compete with hyper-competitive mid-90s Microsoft. It was swept away in the dot-com crash, and in 2001 the remaining assets were sold to Palm for $11 million[3] .Los Angeles Times: Be Inc. Founder Leaving as Firm Nears Closure
Invoking QEMU with -drive media=cdrom,file=BeOS_Tools.bin will fail to locate a boot sector.
The Linux build of Chrome is slightly larger than BeOS 5, and it doesn't even include an OpenGL teapot demo.
du -s --si /opt/google/chrome/
# 278M	/opt/google/chrome/
Minimum requirements for HTTPS have evolved somewhat in the 20 years since the NetPositive browser last saw development, so the modern web can only be accessed via a MITM proxy.